You can add custom authorization logic. Let’s say you had an application helper method in your app named :quick_auth which you’d like to use to enforce authentication. You can configure the Epiphany library to reference that when using the epiphany admin web interface. Add something like this in a file in the initializers directory:
Landmark Explanation is an Entity Matching specific explanation framework based on LIME.
The state of the art approaches for performing Entity Matching (EM) rely on machine & deep learning models for inferring pairs of matching / non-matching entities.
Although the experimental evaluations demonstrate that these approaches are effective, their adoption in real scenarios is limited by the fact that they
are difficult to interpret.
Explainable AI systems have been recently proposed for complementing deep learning approaches.
Their application to the scenario offered by EM is still new and requires to address the specificity of this task, characterized by particular dataset schemas,
describing a pair of entities, and imbalanced classes.
This paper introduces Landmark, a generic and extensible framework that extends the capabilities of a post-hoc perturbation-based explainer over the EM scenario.
Landmark generates perturbations that take advantage of the particular schemas of the EM datasets, thus generating explanations more accurate and more interesting
for the users than the ones generated by competing approaches.
@inproceedings{DBLP:conf/edbt/BaraldiBP021,
  author    = {Andrea Baraldi and
               Francesco Del Buono and
               Matteo Paganelli and
               Francesco Guerra},
  title     = {Using Landmarks for Explaining Entity Matching Models},
  booktitle = {{EDBT}},
  pages     = {451--456},
  publisher = {OpenProceedings.org},
  year      = {2021}
}
The goal of this project is to detect salient entities in text documents.
Input data
The input files are stored in folders and have a JSON structure. Each JSON file contains one document. It should have a text field containing the document text. The documents used during training and testing should have an abstract field consisting of the abstract of the text and an entities field which is a list consisting of entities. An entity is a JSON object and should have an entity field and a salience field. The entity field is the most representative mention of the entity in the document. The salience field is true when the given entity is salient in the document and false otherwise.
Example JSON file
The following JSON file could be used as a training or testing document:
{
  "text": "This text is about dogs. Dogs are animals. Cats are also animals.",
  "abstract": "Text about dogs.",
  "entities": [
    {
      "entity": "dogs",
      "salience": true
    },
    {
      "entity": "cats",
      "salience": false
    }
  ]
}
For evaluating a document, only the text field is required:
{
  "text": "This text is about dogs. Dogs are animals. Cats are also animals."
}
The entities and salience information are determined by the model.
Relevant Sentence Detection (RSD) model
The first model is the relevant sentence detection (RSD) model. This model computes a relevance score for each sentence and reflects whether the sentence is relevant for the abstract of the text or not. The model is useful for text compression.
Train the model
In order to train the model, execute the following script:
The train_path argument should point to a directory containing input files used for training. The test_path argument should point to a directory containing input files used for testing and the out_path should be an empty directory in which the model files, log files and plot files should be stored. All model parameters are configurable. The parameters are explained by the help function which can be found by executing the following code:
Virtual Payment App like paytm which allows a user to transfer a virtual amount to various users. This project is build with concept of transactions in databases. Built with MERN stack.
Here’s a more granular breakdown of your finance application, including requests, pages, models, and other details:
1. Requests (API Endpoints):
User Management:
/api/v1/user/register (POST): Creates a new user account.
/api/v1/user/login (POST): Authenticates a user and returns a token for secure access.
/api/v1/user/ (GET): Retrieves the currently logged-in user’s profile information.
/api/v1/user/ (PUT): Updates the information of the current user Logged In.
/api/v1/user/bulk (GET): Retrives all the users that are currently associated with the application.
Transfer Routes:
Here the user authentication middleware is used to ensure only authenticated requests can access these routes.
api/v1/transfer (POST) : Transfers money from one user to another.
api/v1/balance (GET): Returns the account balance to the authenticated user.
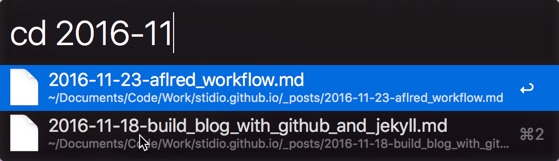
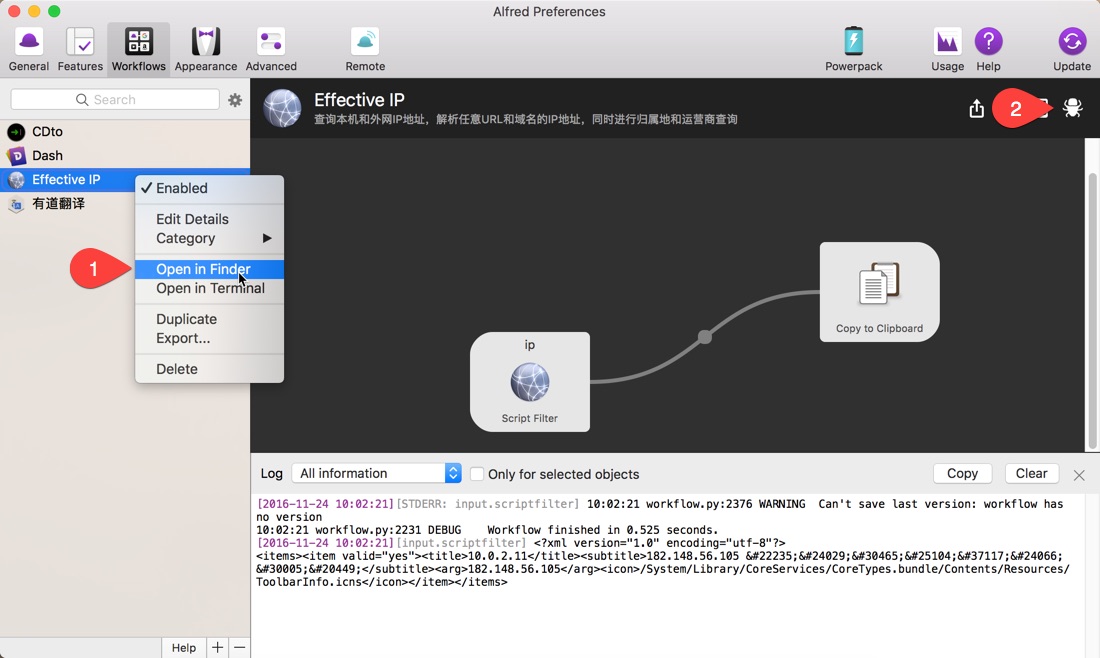
Alfred Workflow的整体架构,极度类似于Windows中的Direct Show,首先由一个Input开始,中间经过一堆filter,然后到一个Output结束,中间通过Pin连接,上一个Output Pin作为输入传递给下一个Input Pin,从而形成一个完整的Graph,而最终传递给Alfred做输出呈现的内容必须符合下面的形式:
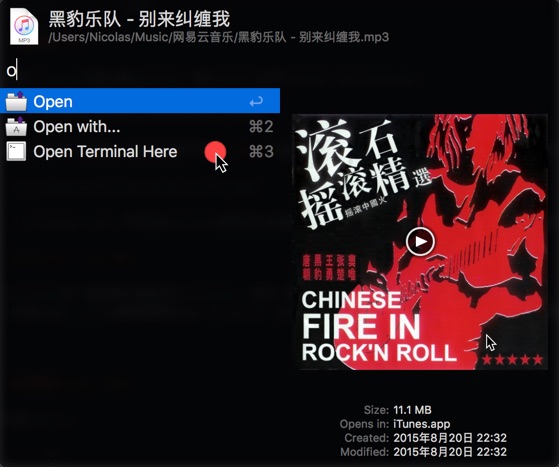
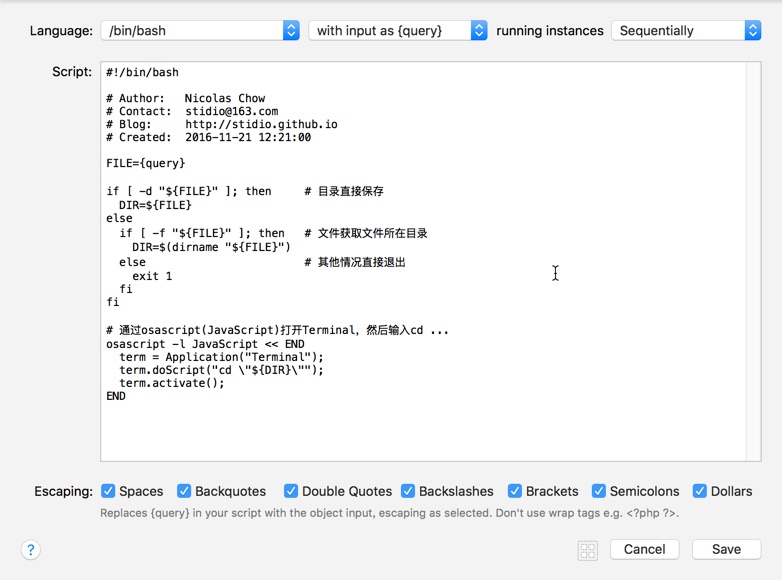
在刚才插入的[File Filter]上点击右键,选择菜单[Insert After -> Actions -> Run Script],并按照下图设置好,最下面的Escaping表示对指定字符进行转义,比如说:/Users/$a1,如果不对$转义,那外部会把$a1一起当做一个变量,而这个变量未定义也就是为空,传递进来的参数最终变成:/Users/,点此查看代码:
Alfred Workflow的整体架构,极度类似于Windows中的Direct Show,首先由一个Input开始,中间经过一堆filter,然后到一个Output结束,中间通过Pin连接,上一个Output Pin作为输入传递给下一个Input Pin,从而形成一个完整的Graph,而最终传递给Alfred做输出呈现的内容必须符合下面的形式:
在刚才插入的[File Filter]上点击右键,选择菜单[Insert After -> Actions -> Run Script],并按照下图设置好,最下面的Escaping表示对指定字符进行转义,比如说:/Users/$a1,如果不对$转义,那外部会把$a1一起当做一个变量,而这个变量未定义也就是为空,传递进来的参数最终变成:/Users/,点此查看代码:
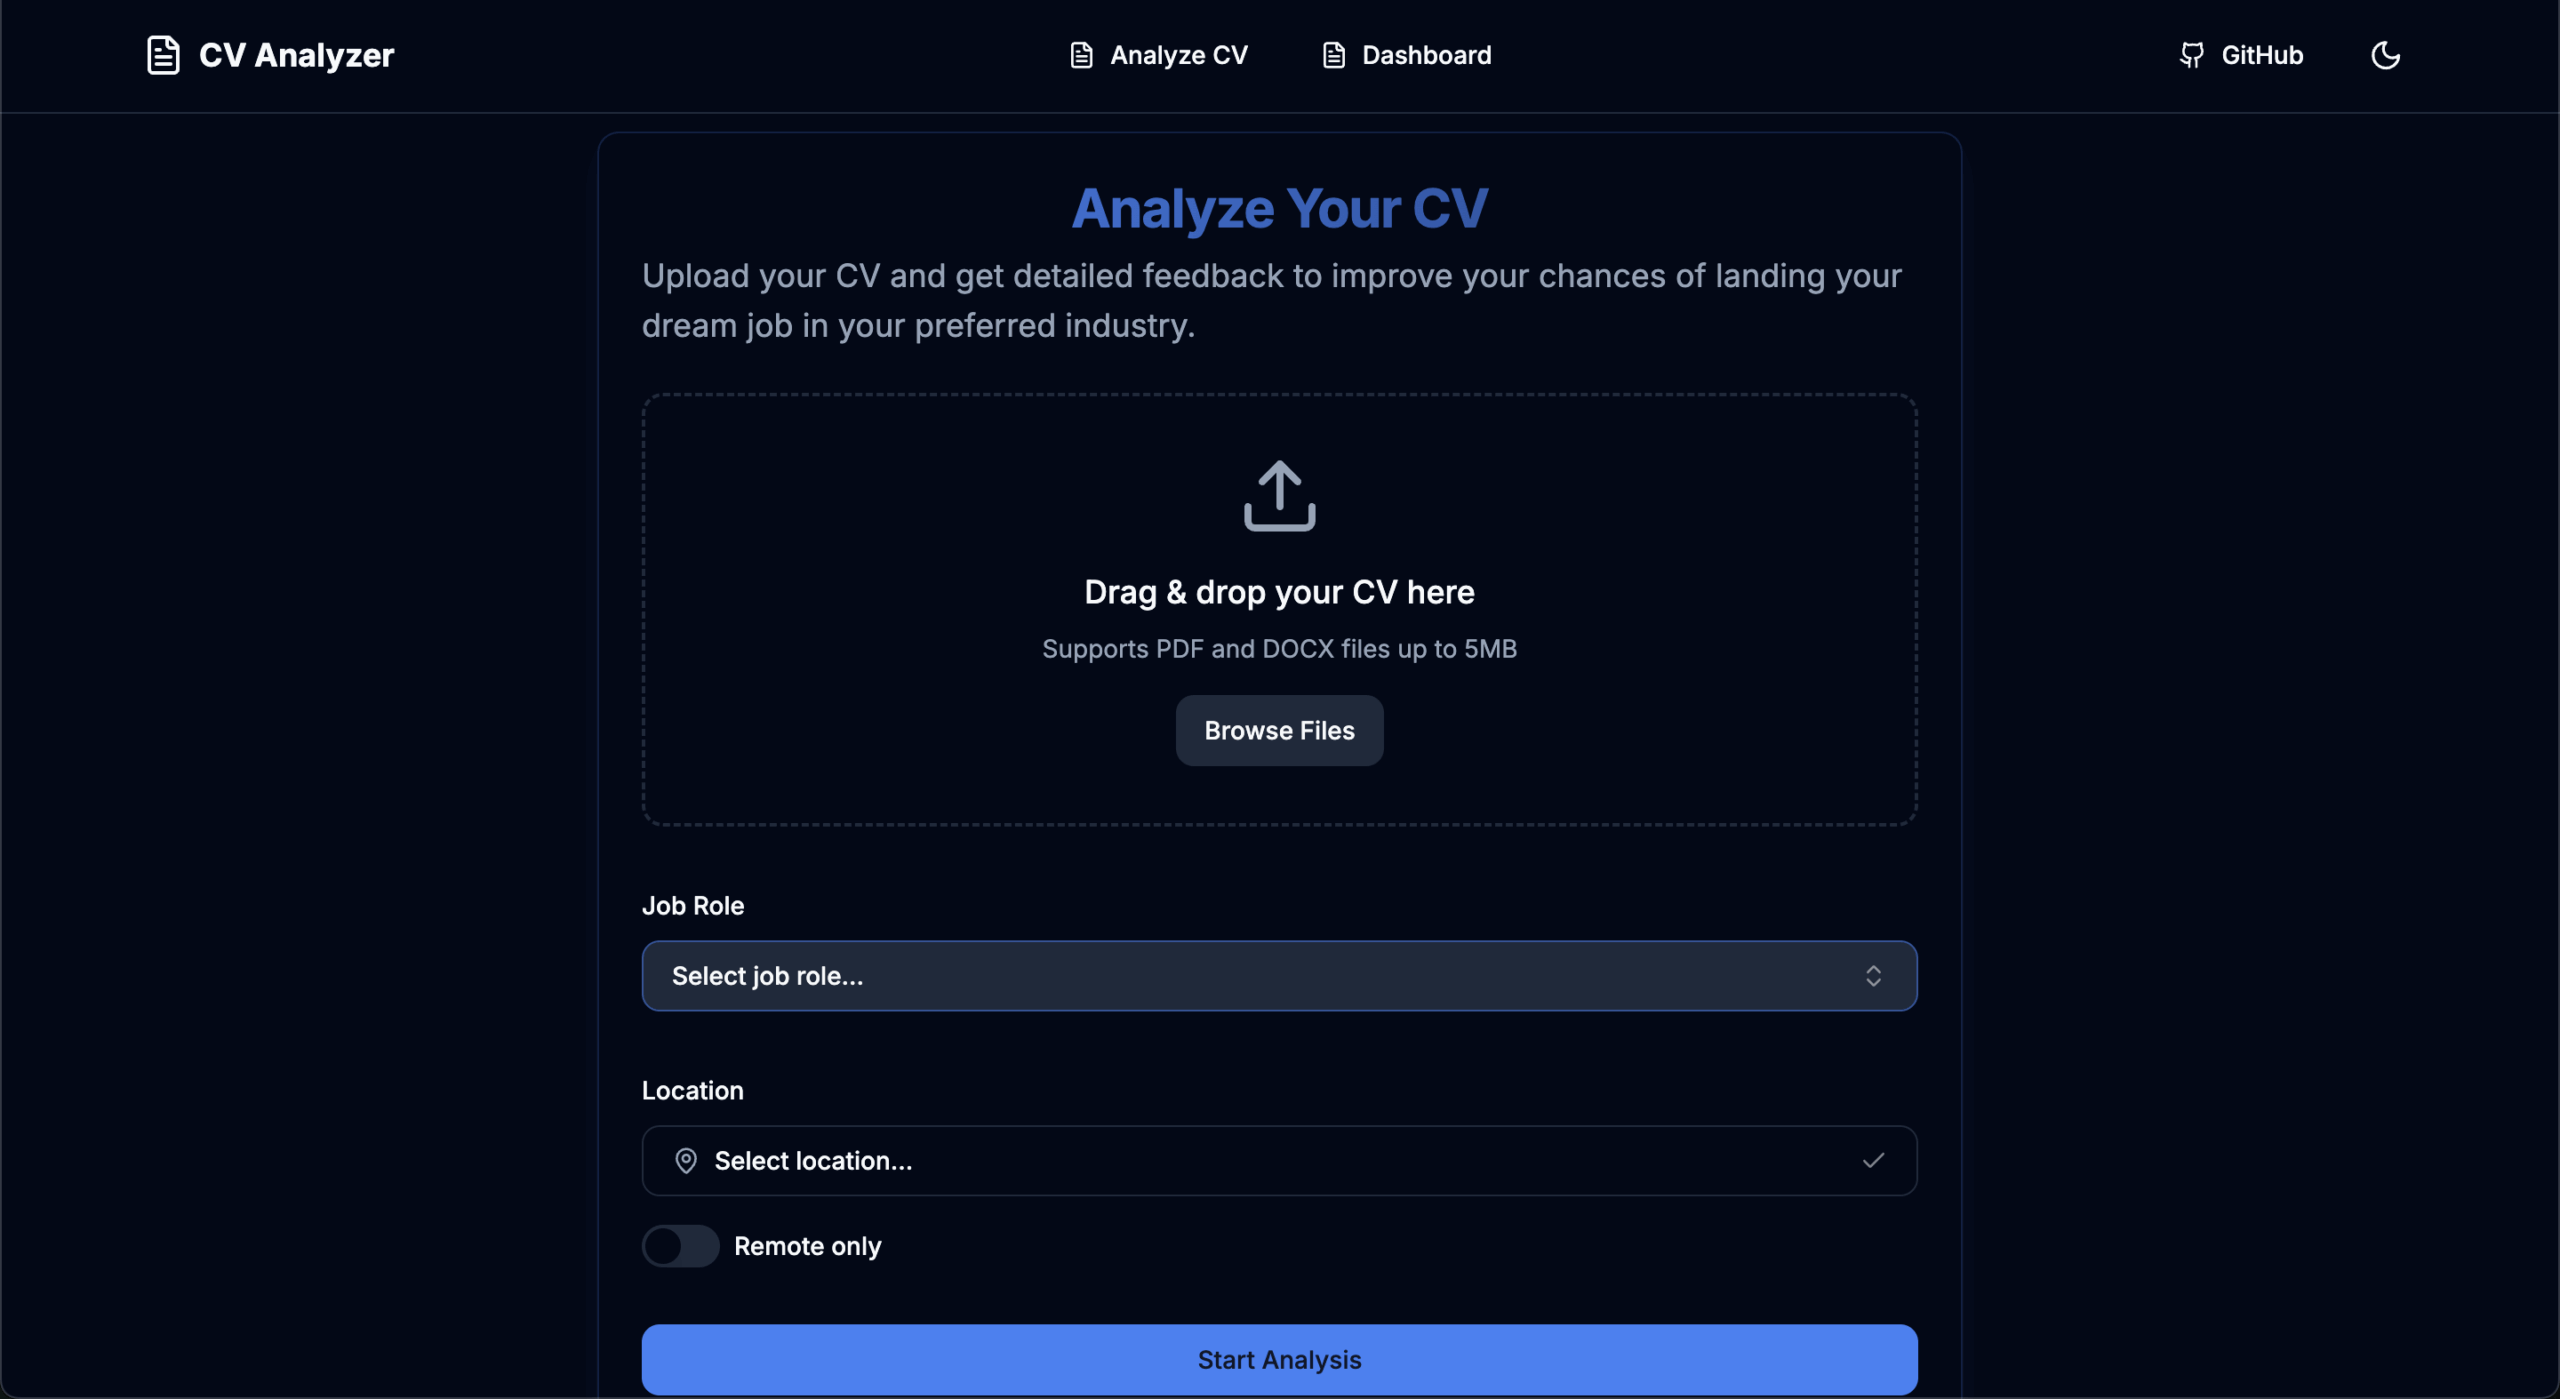
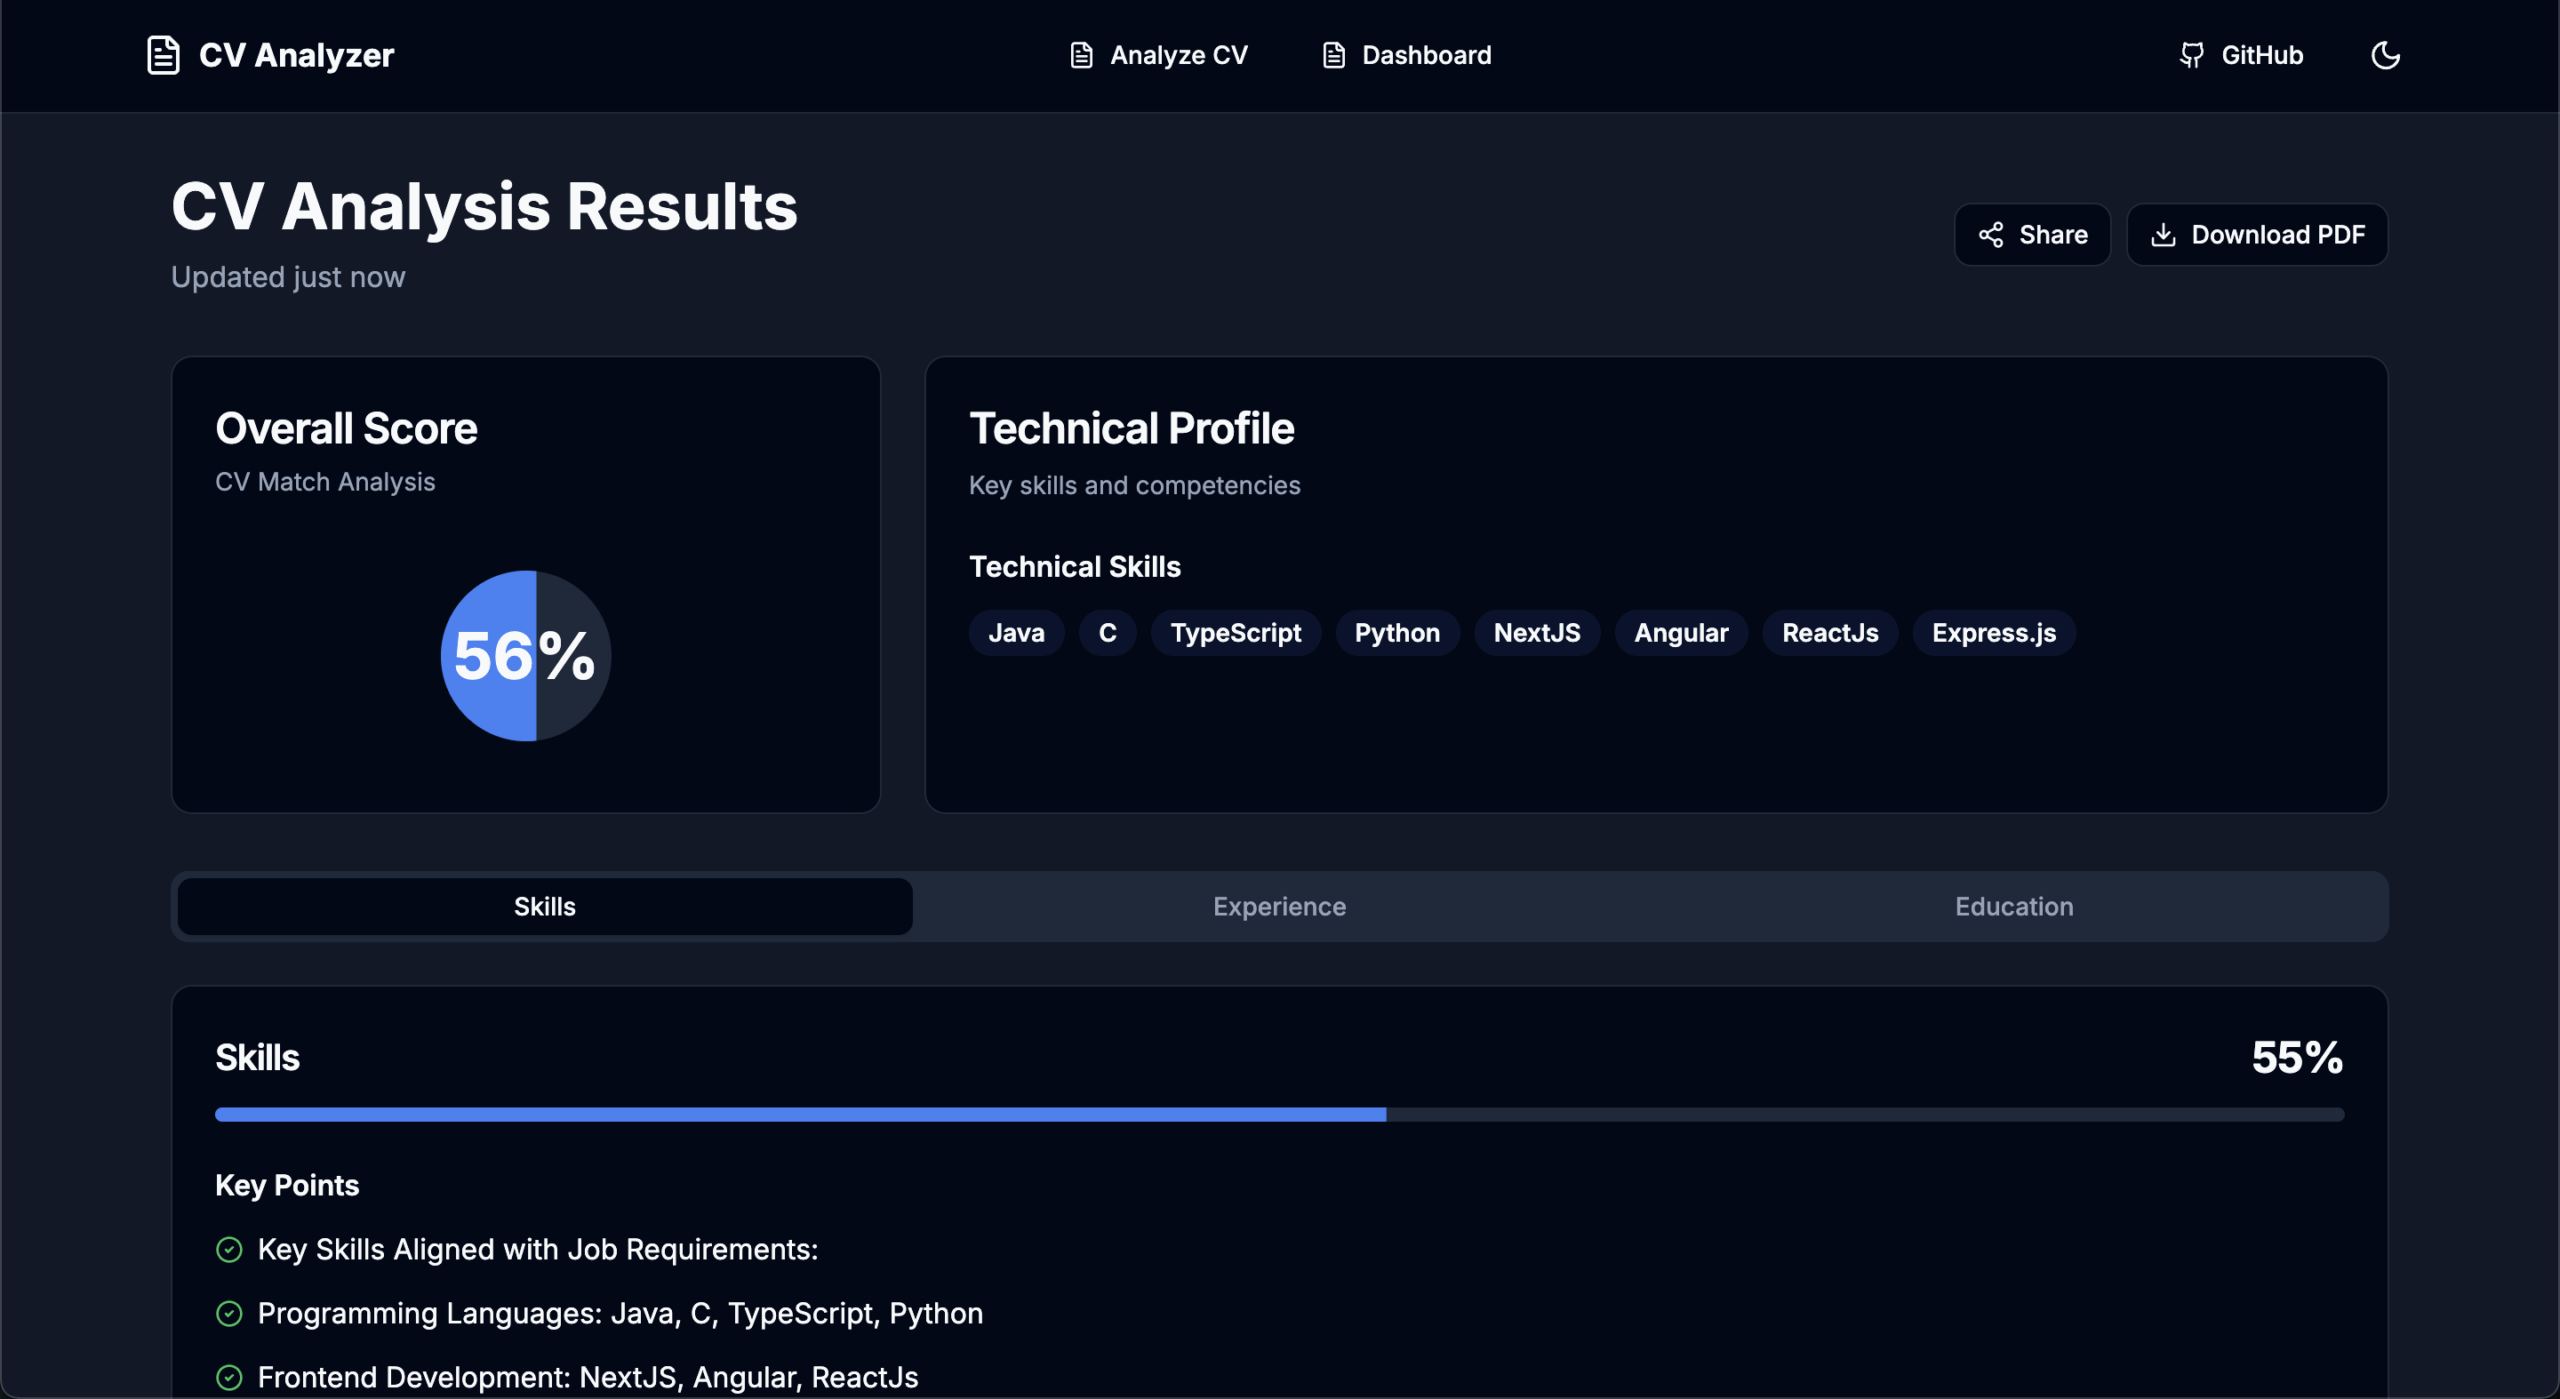
CV Analyzer is a web application built with Next.js that analyzes uploaded CVs, providing insights and recommendations to improve alignment with job roles. The application includes key features like ATS readiness analysis, scoring, and tailored improvement suggestions.
Features
CV Upload & Analysis: Easily upload your CV for analysis.
ATS Compatibility: Analyze ATS readiness to ensure your CV meets applicant tracking standards.
Detailed Feedback: Receive actionable insights on skills, experience, and education.
Score Overview: View an overall score and breakdown by section.
Responsive Dashboard: Access a mobile-friendly dashboard to view your CV insights.
Dark Mode: Switch between light and dark themes for accessibility and comfort.
qvm-pass is a frontend for pass running in a vault VM. It is an implementation of split-pass in the spirit of split-gpg and split-ssh using the qrexec RPC interface of Qubes OS. qvm-pass aims to provide the same user interface as the original pass command. However, the pass git subcommand gets blocked to avoid execution of dangerous operations.
Clone or copy the contents of the repository, then run npm install or yarn install to get started.
There’s a few placeholders that need to be replaced. Please note that these are case-sensitive. For example. if your plugin is named lion-king-quote-generator, you’d rename like this:
Original
Replacement
Used For
posty-starter-plugin.php
lion-king-quote-generator.php
The base plugin file
Posty_Starter_Plugin
Lion_King_Quote_Generator
PHP classes namespace
posty-starter-plugin
lion-king-quote-generator
Textdomain and block name prefix
POSTY_STARTER_PLUGIN
LION_KING_QUOTE_GENERATOR
Constants
postyStarterPlugin
LionKingQuoteGenerator
JavaScript l10n variable*
*This is the $object_name variable when localizing a script in the Assets class.
Development
Run npm run start to start developing. Webpack will automatically process style and script changes.
Build
Run npm run build to compile and minify all assets.
Features
Posty Starter Plugin has a bunch of features that enable you to get productive right from the start.
Custom Post Types
To register a new custom post type, you need to extend the Custom_Post_Types/Base class like so:
This creates the posty-event post type. The slug, singular and plural options are mandatory, and the args option allows you to overwrite any option passed to register_post_type.
The nice thing about registering custom post types like this is that you can extend these classes with any kind of functionality related to the post type. For example, you might want the ability to get the latest three events. You could add it like this:
A similar method could be used to implement functionality related to a single event. For example, let’s say you have a meta field event_ticket_price that contains the price of an event. You could add this code to your Event class to easily obtain this price:
/** * Get the ticket price of an event. * * @param WP_Post|int $event * @return string */publicstaticfunctionticket_price($event = null) {
$event = get_post($event);
returnget_post_meta($event->ID, 'event_ticket_price', true);
}
By adding $event = get_post($event), the function defaults to the current event, but also allows you to get the price of a specific event by passing the post ID or a WP_Post object.
Taxonomies
Taxonomies work almost exactly the same as custom post types. One difference is that you can also pass the object_type option to link the taxonomy to a specific post type. See the Event_Category class for an example.
Assets
The Assets class takes care of registering styles and scripts. The @wordpress/scripts package is used to automatically list the dependencies needed for each scripts.
The code in editor/index.js only runs in the Block Editor, and the code in frontend/index.js only runs on the frontend of the site. The same principles apply to editor.css and frontend.css
Note: if you want to use Sass instead of CSS, install and add sass-loader to webpack.config.js.
Blocks
A big focus of the Posty Starter Plugin is making it as easy as possible to register blocks. All blocks can be found in the src/js/editor/blocks folder and are initialized in src/js/editor/index.js. To render a server-side block, add a template file with the same name as the block to the templates/blocks folder.
For more information on developing blocks, please refer to the Block API Reference.
Helpers
In helpers.php, you can find a collection of custom helper functions as well as add your own.
classes
classes is similar to the very popular classNames package for JavaScript, and allows you to conditionally add classes to an HTML element. It’s based on classnames-php.
These two functions allow you to render template parts from the templates folder with custom parameters. To demonstrate how this works, here’s an example. Let’s say you have a template part, templates/hello.php, that looks like this:
$name = 'Phil';
echo"Hello, my name is {$name}.";
This would output Hello, my name is Phil. To render this template part, you can use the get_template helper function:
echoPosty_Starter_Plugin\get_template('hello');
However, you might also want to want to make the name dynamic. To allow this, get_template accepts an array of parameters: